Budapest Campaign - Into the Valley of Death

Following on from the Soviet victory at the Ojtozi Pass my Axis opponent and I moved onto the second scenario of Warlord's Fortress Budapest. As before the action has been laid out in Battle Chronicler.
Scenario 2 - Into the Valley of Death - 1250 points
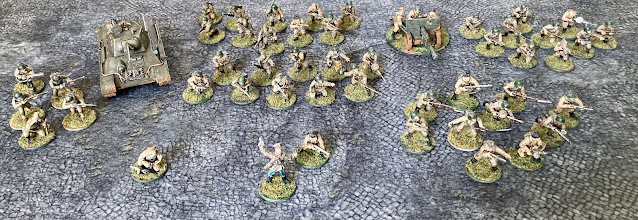
Soviets Guards Armoured Platoon:
- T-34 Platoon. 3x regular T-34. Pl Comd has poor radios.
- Tank Rider Platoon. 3x regular nine man sections of Tank Riders.
- SU-76 - regular.
- Tokarev - regular.
- Bren Carrier - regular.
- MMG team - inexperienced.
- Ensign Bozsoki's Zrinyi.
- Stug - regular.
- Hetzter - regular.
- Veteran Honved. Ten men, 1x LMG.
- Veteran Honved. Ten men, 1x LMG, 2x SMG.
- L44 Pancelrem Team - regular.
- Forward Air Observer - regular.
- Pak 40 - regular.
Soviet Force Selection. I'm on the offensive, I've got to get across the board, clear objectives and then hold them. Everyone has to be mounted. The core of the force will be T34 Pl led by a Tank Pl Comd with poor radios (10 points saved to go on upgrading the SU-76). Each T34 will carry a 9 man squad of regular Tank Riders - ideal for clearing any infantry off the objectives if we can get there... With the remaining points I'll bring SU-76 for an additional medium anti tank gun and a Tokarev to provide anti-infantry firepower. That leaves just enough points to bring a Bren Gun carrier with two LMGs and carrying an inexperienced MMG team - I don't have high hopes for this element but they can capture an objective together and pin down any infantry or weapon teams - more to the point they also give another two order dice relatively cheaply to try and help keep the initiative with the Soviets. If I'm going to at least pin the Axis heavy AT guns before they wreck my T34s then I need to be firing first.

Turn 1

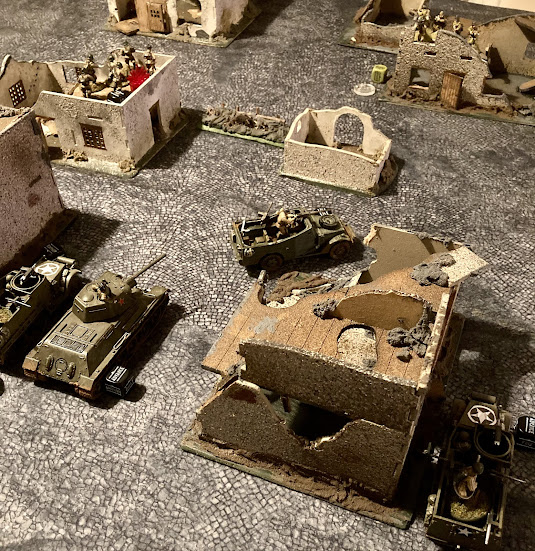
Turn 1 - The Spearhead Arrives. So I had a clear plan until the first pull of the dice... The Axis defence was split as I had hoped. I was all set to start piling across the Western side of the board with all three T-34s in the lead to pour fire into the defence of the wood and then use the Tokarev, Bren and SU 76 to block Axis reinforcement from the East. However, Axis pulled the first dice and placed the Pak 40 on ambush. Ensign Bozsoki's Zrinyi has started in ambush as well. I was therefore faced with the near certainty of two of my T34's getting hit as they came onto the board, likely they would survive; however, they would dismount their tank riders in the open a long way short of the objective...not good.

So the plan changed. Using the western hill as cover the Soviet spearhead shifted to use the road and I intended to move down the road an then hook West toward the objective. With this in mind the Soviets launched into the centre. The lead T34 was immediately hit by Bozsoki and although the crew were only stunned the tank riders clinging to the back decks bailed out and went to ground at the foot of the hill. The second T-34 came up the road more cautiously and try to take vengeance on the Hungarian commander but budget soviet gunsights and a bumpy road lead to a wasted shot. On the Eastern side the Hetzer went to ambush allowing me to commit more forces down the central road. Hoping to draw the Pak 40's ambush shot the Bren Carrier entered down the road flat out carrying the MMG a full run move to reach the buildings of Sozfurdo. As hoped the Pak 40 engaged but missed allowing the Tokarev to move up more slowly and engage the well sited Axis AT gun despite the huge output of MMG ammunition the Pak 40 only lost a single crewman. The final T34 rumbled down the road and fired into the building in which the Hungarian M44 bazooka team were hiding, with significant good fortune the Axis weapons team were point of action by flying masonry which significantly reduced the threat to Soviet progress down the road. Lastly the SU76 entered the table and rather optimistically tried a shot at the STUG. Much to my surprise and my opponents frustration the SPG landed its round with a six, penetrated with another six and then detonated the STUGs bomb load with a third six. Shocked by this start the Veteran Honved on the Western objective opened up on the SU76 with their LMG and placed a pin - not quite payback but every pin helps. Elsewhere the FAO radio'd for air support against the tightly packed Soviet armour. Meanwhile in the East the Veteran Honved moved to lace themselves in the wood with arcs onto the road.

Turn 1. The Soviets roar down the centre. Bozsoki blunts the charge and the SU-76 knocks out the Stug,
Turn 2

Turn 2 - the Soviets fail to keep up the momentum. The turn started with the Axis air support diving out of the leaden sky. Fortunately the Tokarev gunner was vigilant and avalanche of MMG ammunition drove the diving Stuka off saving the Soviet spearhead from a potentially lethal intervention. The T-34s try to seize the moment with the Pl Comd attempting to engage Bozsoki's Zrinyi; however, he failed his order test and instead received another round in the face from the Hungarian officer. While the wavering crew survived once again with only another pin added the Soviet commander was not doing anything to enhance the reputation of the Guards today. The other two tanks advanced and started laying fire on the Pak 40 succeeding in pinning the crew but not knocking them out. The Axis struck back with the Hetzer pulling forward and using a single shot to knock out a T34 and force its riders to debus and seek cover. Meanwhile in the West the Honved and SU76 exchanged fire inconclusively. The Eastern Honved placed a pin on the Tokarev which then also failed to return fire. In return the Bren Carrier put a pin on this squad. Finally the Forward Air Observer, miffed by not achieving anythnig with his airstrike engaged the final squad of tank riders who were still mounted forcing them to debus and seek cover.

The Hetzer announces its presence by knocking out a T-34 (badly dressed as a Sherman).
Turn 3

Turn 3 - dishonour of the Guards. Turn 3 should have been a turn for the Soviets to set the conditions for the final assault instead it became largely a showcase in cowardice and ineptitude. I began by drawing the first dice and attempting to advance the Pl Comd T34 out of Bozsoki's line of fire and get a shot off at the Hetzer that now threatened my flank - sadly, again, the Soviet leader bottled it and stayed quaking in the Zrinyi's crosshairs. Remarkably he got away with it and again Bozsoki failed to knock him out for good. The Axis drew again and the Hetzer, predictably went for the second central T34 but, much to my relief, missed with its main armament. The Hetzer then turned its MMG on the northern most Tank Rider squad who went down and escaped unharmed. With the Hetzer no longer a threat for the T34 it had just targeted engaged the Pak 40 and finally put it out of action. The Axis took the next dice and the Eastern Honved forced the second Tank Rider squad to go down. On the Western side the Honved engaged the final Tank Rider squad on the hill and killed five of them in an impressive hsow of marksmanship - the Soviets stayed in the fight but were unlikely to pose much of a threat now. The SU76 exact some vengeance by killing another of the defenders and placing a single pin. The end of the turn was quiet with the Tokarev failing its order check and the Bren Carrier putting a single pin on the Eastern Honved.

Turn 4

Turn 4 - the Soviets break out (or at least a few of them do...). The Soviets drew first and I had to start getting out o the killing area in the centre. The Northern T34 led the advance and at this point I faced a dilemma. I wanted the tank to engage Bozsoki and, failing that, block him from advancing to contest the objective. But, I also wanted to maximise the firepower applied against the Eastern Honved in order to set conditions for the assault my tank riders would have to make soon. My best method of taking Bozsoki out the game would be to run the T34 to 1" in front of him blocking him from advancing; however, if i did this I would be able to shoot the Honved or the Hungarian Pl Comd. Instead I settled for a hedge by advancing the tank to the objective so i could engage Bozsoki with the main gun while the bow gunner took on the Honved. Time would tell whether this was the right call (place your bets now and read on...). The bow gunner did as required and killed a veteran in the woods but the main gun glanced from the Zrinyi's hull glacis. Fortune balanced the books with Bozsoki hitting, penetrating but only stunning the barn door. side on target I had provided. The next critical activity was for the Hetzer and the second T34 to act. The Soviet Pl Comd stopped trying to act aggressively and instead rallied to try and get back in the fight in Turn 5. The Hetzer advanced and engaged the Tank Rider squad sheltering by the building with its MMG - the Soviets went down but still took a pin. The Axis tank destroyer then directed its main gun at the Tokarev but missed. The Tokarev, for its part, needed to get out of there but instead also bottled it and stayed idling in the dubious cover of the wood's edge. Seizing the moment before the Eastern Honved could engage the remaining full size squad of Tank Riders sprinted up to shelter behind this tank ready to then launch across the open ground to take the Western objective. Finally the SU76 missed the Western Honved.


While the Veteran Honved guard the Western objective.
Turn 5
Turn 5 - Crunch Time. In Turn 5 it was pretty clear what I needed the Red Army to achieve. 1. I had to take the Western Objective - this would need the Veteran Honved to be written down as much as possible and then assaulted by Tank Rider Squad 3. 2. I needed to destroy Ensign Bozsoki's Zrinyi to stop him advancing to contest the central objective. 3. I needed to stop the Hetzer from picking off my armour from behind. Thanks to the order dice overlap the Soviet drew first and the Northern T-34 was tasked to complete task 2. However, shaken by their proximity to the lowering muzzle of Bozsoki's howitzer the crew took the foolish decision to cower in the turret and failed their order check. Bozsoki seized the opportunity and this time knocked out the Soviet tank. This was sub-optimal and was going to make taking two objective rather tricky. However, inclined to make the best of it the Soviet Pl Comd advance and knocked out the Hetzer with a single shot. After this dramatic start to the turn there was a quieter spell with the SU-76 (still immobilised) and MMG team killing two of the Veteran Honved and placing valuable pins. This suppression did its job and forced the Veteran Honved in the West down allowing Tank Rider Squad 3 to assault. With six veterans remaining against nine regular, though SMG armed, Soviets the combat was not certain although I felt fairly confident. However, the assault troops excelled themselves and comprehensively overwhelmed the defenders - one objective secured. The remainder of the turn was quiet with the Tokarev withdrawing out of LOS of the Eastern Veterans but still managing to kill the Hungarian Forward Air Observer. The Bren Carrier and Eastern Honved exchanged pins. Tank Rider Squad 1 (four men left) ran forward into the cover of the burnt out T-34 - two objectives secured (for now). Finally Tank Rider Squad 2 moved through the house ready to, optimistically, assault Bozsoki.


The Soviet Pl Comd takes on the Hetzer.
Turn 6

Turn 6 - Hero of Hungary. Turn 6 has even more obvious priorities than Turn 5. I had to destroy Bozsoki to prevent him from contesting the centre objective. None of my units were in position to reach the Eastern objective and if they did they would need to defeat the largely untouched Veteran Honved near by. However, with no anti-tank grenades its was going to need a pretty punchy effort from the tank riders to secure a win. The SU-76 was still immobilised and couldn't see Bozsoki which meant this turn would see one of the Pl Comds become man of the match. The Soviets drew first again and the Red Pl Comd got straight to business hurling a main armament round well over Bozsoki's head. Ensign Bozsoki advanced within 3" of the objective and then calmly drew a bead on the T-34. Clearly distracted by the amount of Soviet infantry scurrying around the Zrinyi crew also failed to hit the mark. With main activity now concluded it was time for heroics from the Soviet Tank Riders. Sadly the large squad which had a slim chance of doing some damage failed their tank fear and hid in the house. More impressively the four man squad bravely took on the Assault Gun and charged into the attack - predictably though they were unable to more than bang loudly on the armour with their mess tins. And so at the end of a furious conflict in which the Hungarian force took heavy casualties Ensign Bozsoki was left contesting the centre objective. Having only secured one objective it was defeat for the Soviets and 1-1 at the end of Scenario 2. This was another really enjoyable game. For what its worth I went into this one not expecting to win - the need to ensure the Hungarian could not contest two objectives was a stiff ask I thought. I had bags of luck though with the early destruction of the STUG and somewhat over-powered air defence capability provided by the Tokarev - this got me closer to success than I expected to. I also find it slightly surprising that the Soviet do not receive a bombardment to start their assault - a stack of pins on the defender would have been helpful. All in I thought the force selection was OK for the task but I should have spent the points for anti tank grenades knowing I'd be up against armour this might have made all the difference on Turn 6. Shoulda, woulda, coulda...


Comments
Post a Comment