Budapest Campaign - The Back Door Left Open
After a busy interlude Uri and the mob have finally had the chance to get into Budapest. The first of the urban scenarios, this one sees the Soviets having to get into the German end zone (a now familiar task) and then hang out there while the Axis turn up late to the party.
Scenario 7 - The Back Door Left Open - 1000 points - Soviets vs Axis (Hungarians & SS).
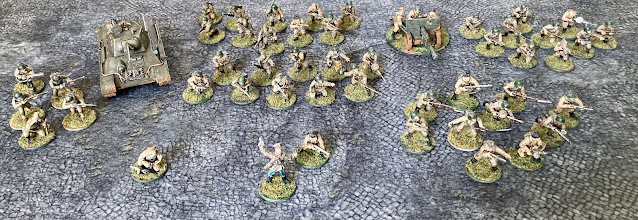
Soviet Forward Detachment Reconnaissance Party Platoon:
2Lt. Inexperienced. One runner.
M3 Half Track. Regular - 1x HMG.
Mounted Recce Section. 7x Veterans - 4x SMG.
M3 Half Track. Regular - 1x HMG.
Mounted Recce Section. 8x Veterans - 4x SMG, 1x flamethrower.
White Scout Car. Regular - 1x HMG.
Mounted Recce Section. 7x Veterans - 5x SMG.
Universal Carrier. Regular – 2x LMG.
Mounted Recce Section. 5x Veterans.
T-34/75. Regular.
Budapest Pocket Defenders Platoon:
2Lt. Regular. Two runners.
Gendarmerie Section. 5x Regulars - 1x LMG.
University Assault Battalion Section. 7x inexperienced - 1x LMG.
Sniper team. Veteran.
MMG team. Veteran.
8th SS Cav Section. 5x Veterans, 2x Assault Rifles, 2x Panzerfaust.
8th SS Cav Section. 5x Veterans, 2x Assault Rifles, 2x Panzerfaust.
8th SS Cav Section. 5x Veterans, 2x Assault Rifles, 2x Panzerfaust.
8th SS Cav Section. 5x Veterans, 2x Assault Rifles, 2x Panzerfaust.
Pz IV. Regular.
Soviet Force Selection. The first real urban scenario we've played out in Bolt Action. Given the protection received by infantry in buildings and the tendency we both have for using veterans it seems unlikely that many squads are going to be wiped out by small arms fire. Therefore, close assault and HE will be the decisive offensive mechanisms here. However, the Forward Detachment list is, unsurprisingly, light on fire support options. The scenario also penalises the Soviets for any units that dont make it into the Axis end zone - so towed guns are going to be a liability - therefore my only real HE option is a T-34. With that in the rest of the force is designed to get as many veteran recce soldiers into the end zone as possible.
Soviet Plan. The Axis are delayed in getting reinforcement in this scenario and anything that I haven't got into the axis end zone costs me victory points so it seems the best bet is to use the two turns of grace I have to rush across the board, kick in the defence and then hunker down and hold what I've bitten off. With little variation in the force available I'll look to send the flamethrower squad in early to clear an 'Alamo' for me then bring in more squads to set up a perimeter. The T34 will look to get eyes on the approach to this position and go into Ambush to try and roll up any Axis armour early. I am perilously thin on ATk capacity as the recce squads can’t carry any (not even ATk grenades) so any Axis heavy support that arrives will need to be hit by the T34 and pinned with HMG from the transports - definitely a weakness of this list.
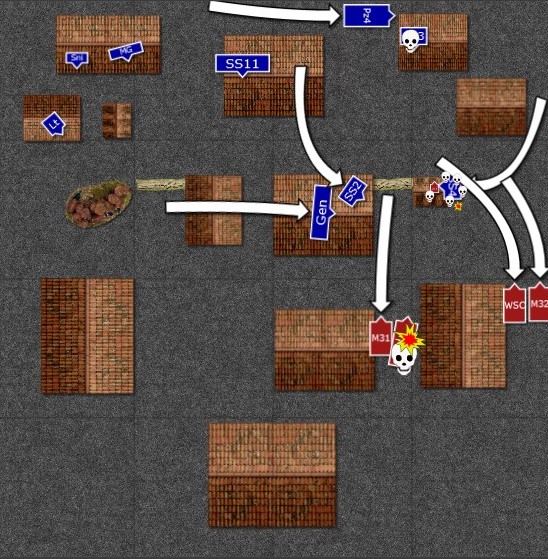
Deployment
Deployment. Once again the Soviets are blessed with the Axis having to deploy prior to the Soviets committing. The Scot sets up logically - covering both flanks with the two mandatory squads and reinforcing the inexperienced but 'Fanatic' University Assault Section with his Pl Comd. I'm keen to secure my lodgement and want to concentrate my force to allow the T34 to provide intimate support to as much of my force as possible while being mutually supported by the dismounting recce sections (seems topical); therefore, I'll look to push down one flank. The right hand flank seems to offer the best combination of buildings to provide my 'Alamo' in which to establish hasty defence.
The Axis Pl Comd and entourage of Students cover their obstacles with fire.
Turn 1
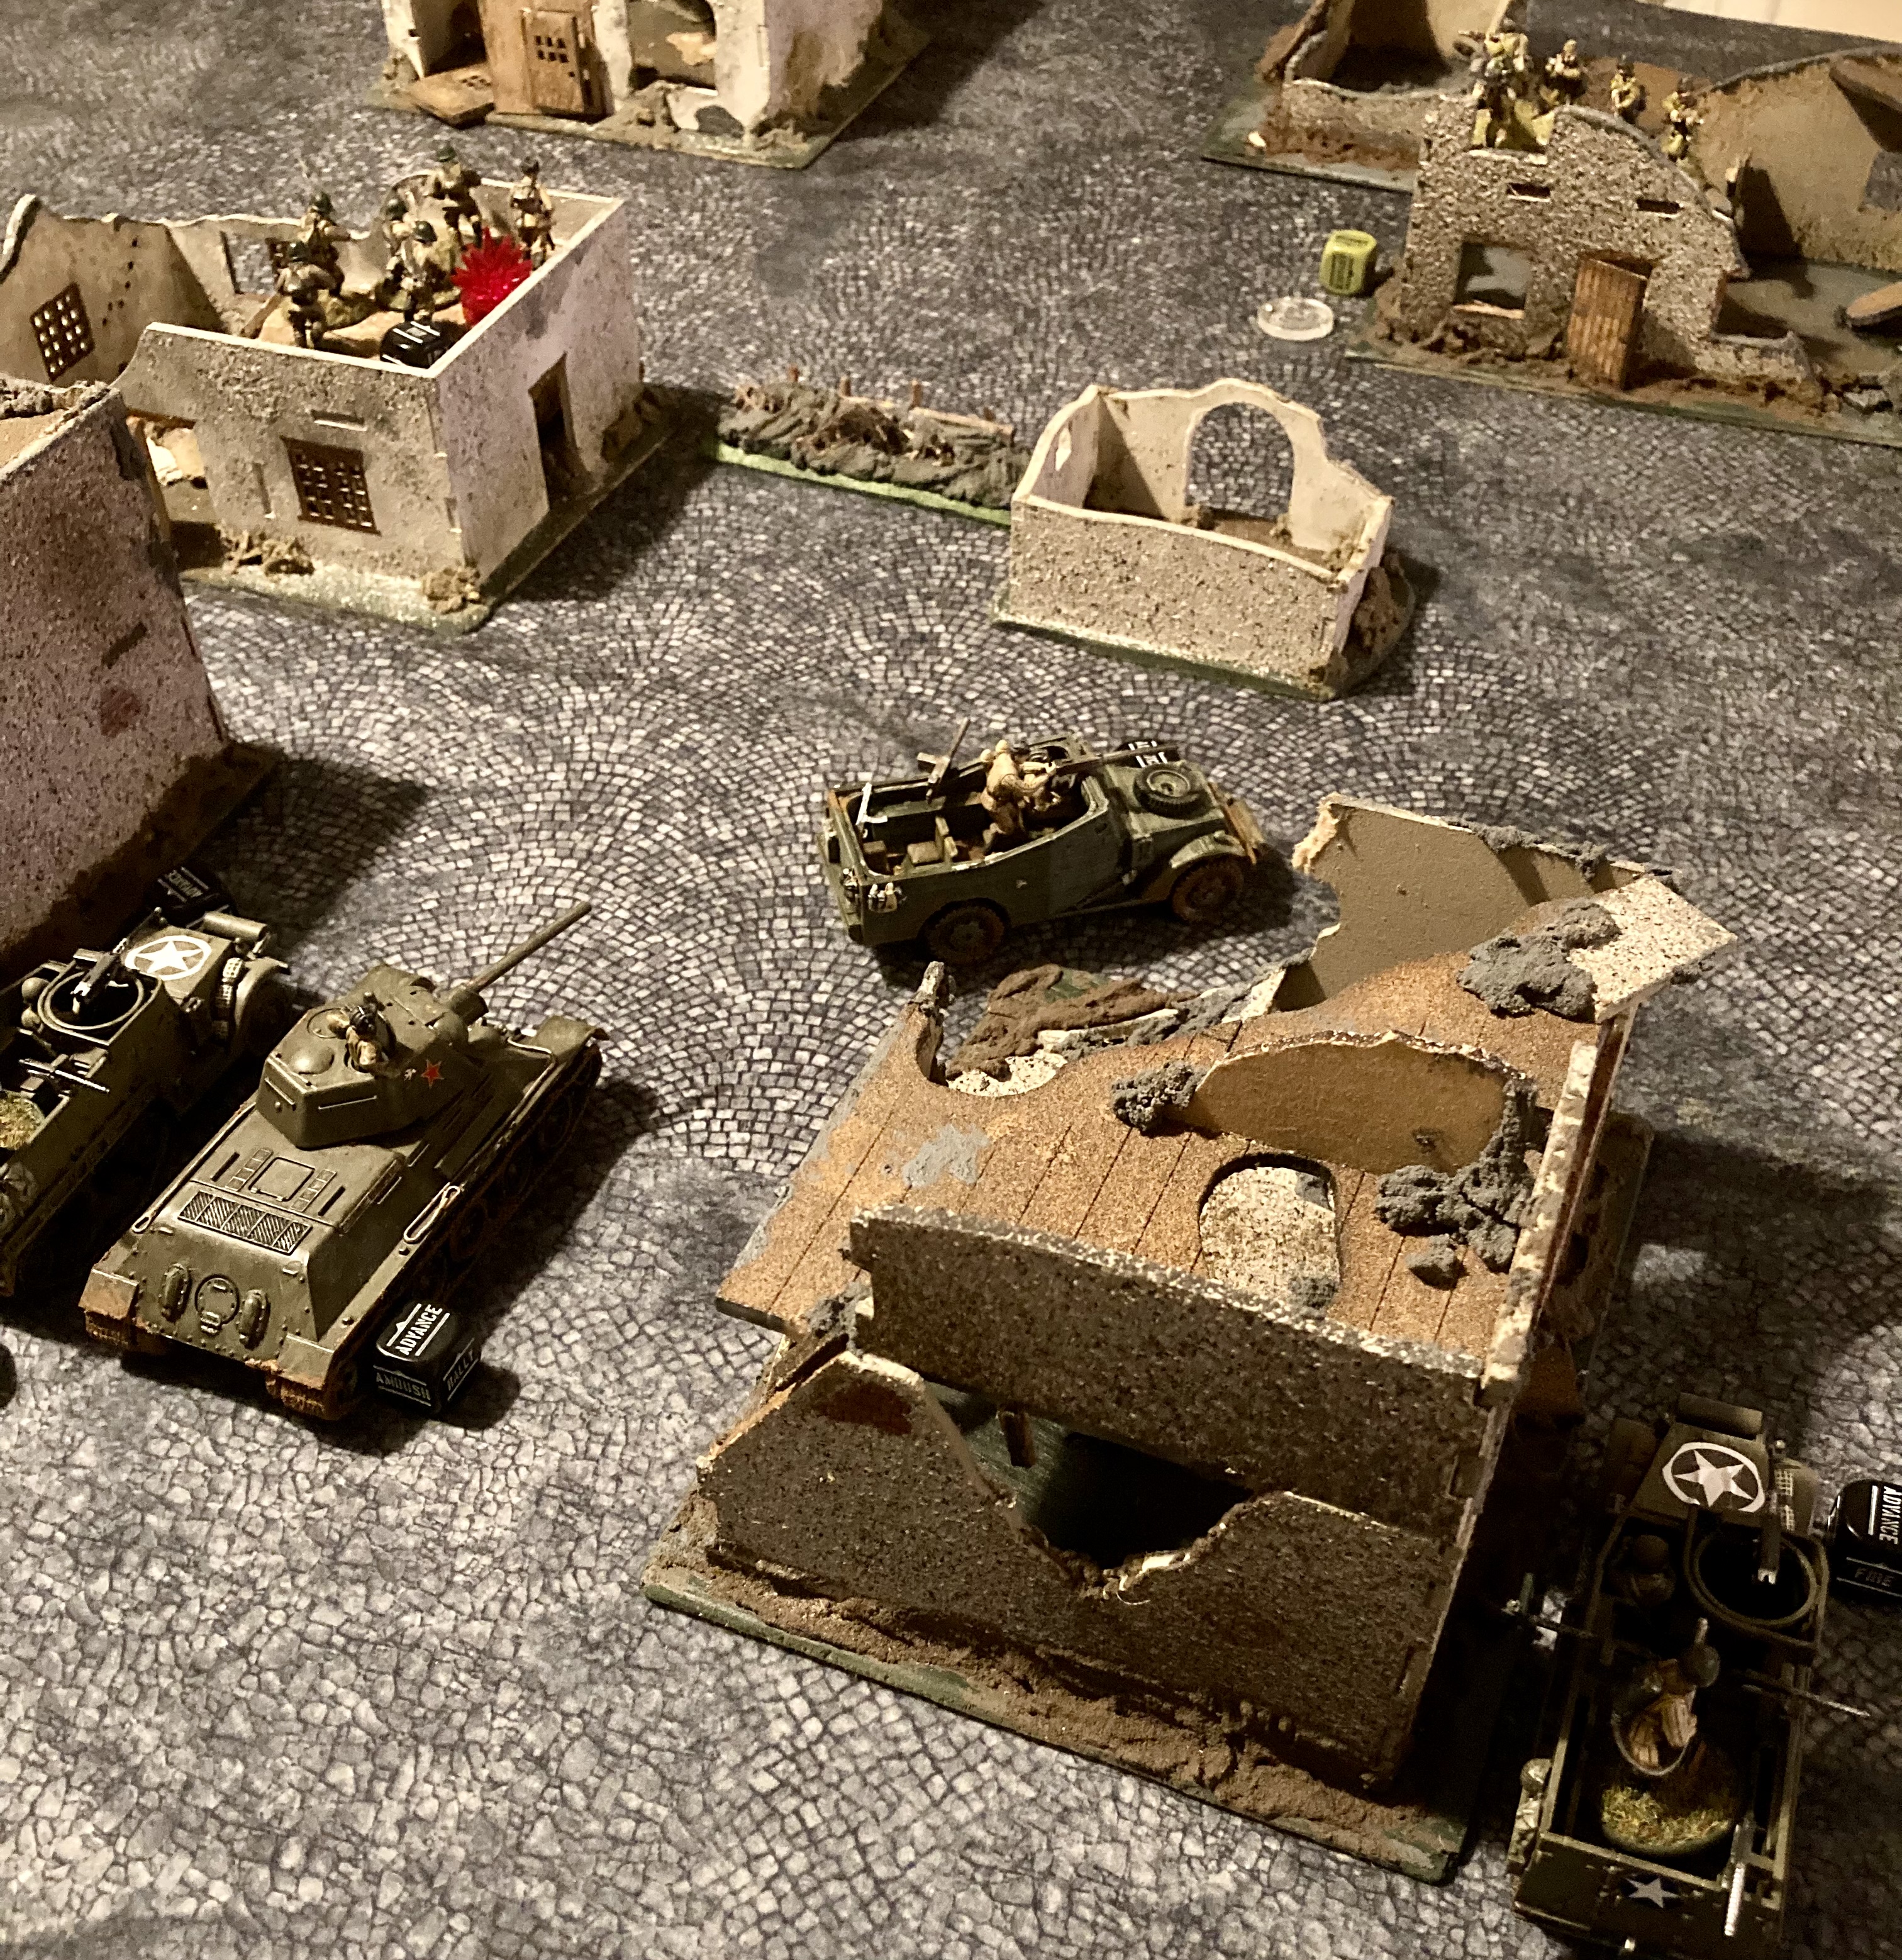
Turn 1. Home Run. Turn 1 was free play for the Soviets. The Recce Pl poured onto the right flank advancing swiftly while still mounted. One of the squads de-bussed and ran into the central house facing the hospital (the centre building in the Axis end zone). At this point the buildings in the NE corner were going to be my 'Alamo' and this squad was now well placed to cover its flank. On the way in the Gendarme Sn revealed themselves and put a pin on the sprinting Soviets. The now exposed Hungarians received the attention of first the transports and then the T34. However, two rounds of HMG fire only put a pin on the defenders and the T34 managed to miss the building. Not a convincing start.
The Gendarme Section find themselves at the point of the Soviet spear tip.
Turn 2

Turn 2. Break-in. The Soviets kept the initiative and needed to make the most of another thin turn for the defenders. First up the flamethrower section was dropped off outside the Gendarme's house by their transport. The section opened up with both small arms and flame destroying the defenders. Good - that was the Alamo now clear and ready to be defended. Or not - at this point I actually read the rules for flaming a building and noticed the 50% chance of setting it on fire rendering it impassable. A quick roll of the dice and I had denied myself my own chosen bolt hole. Whoops. Oh well, refresh to the plan - bypass the now burning position and hunker down in the last building in the NE corner and expand my lodgement to include the hospital. In the centre the squad watching the hospital sprinted across the street to size it before the SS started to turn up. The militant student union spotted the move and one recce soldier was shot down as they crossed the open street. This lodgement was rapidly reinforced by the Bren Carrier dropping its five-man squad off who ran across to also start sand-bagging the hospital. Depressingly appropriate for the Soviets to occupy a building with protected status given the rate of war crimes currently being perpetrated by Russian troops in Ukraine. The remaining recce squad occupied the now vacant house facing the hospital while the Pl Comd and transport also moved into positions to provide fire support. Finally the T34 placed itself in ambush to await the PzIV...
The Gendarme Section are driven off by flame and SMG fire as the Soviet assault makes contact.
With the ‘Alamo’ on fire the Soviets shift axis to the centre and ‘secure’ the hospital.
Turn 3

Turn 3. A game within a Turn. Soviets drew first and the flamethrower team ran into the most NE house to complete the Soviet perimeter. Now all I had to do was hold my houses and cash in the points. Free to now release their reinforcements the Axis launched a brisk counter attack led by their armour supported by fanatical sections from 8th SS Cavalry Division. I wasn't particularly worried as all my sections (less one) were larger and loaded up with assault weapons - close assaults should be a fairly even affair. The Pz IV rolled onto the board and engaged the sections in the hospital - to no effect. The bow gunner failed to pick out any Soviets while the main gun managed to miss the hospital at point blank range. Unimpressed by their intimate support tank the lead SS section assaulted onto the board charging my small recce section in the hospital (the one with no SMGs in). With no defensive fire I expected this to be pretty painful. In a brutal combat the defenders did well and clubbed down four SS men but were still wiped out in the fighting leaving the SS section commander inside the hospital having succeeded in breaking in. Soviets got the next dice though and the squad facing the hospital counter-assaulted across the street - seven veteran Soviets against one SS-man. This would nip me a point and consolidate my position in the hospital nicely. In an unpleasant turn of events though the SS NCO shot down one attacker and then proceeded to beat them off in close assault forcing the survivors to break and go to ground for the rest of the fight. Arg. Continuing the momentum Axis exploited from the initial assault with the next SS section assaulting the other half of the hospital. A closer fight but again the SS carried the day leaving the hospital firmly in Axis control. Seeking to consolidate their progress the Axis MG team ran in to set up where it could protect the approach to the hospital. As soon as the team poked their noses out the window they were raked by both LMGs on the Bren Carrier losing two of the gun crew; stoically the remaining veteran MG operator re-arranged the ammo tins and got ready to carry on. Slightly losing my cool I turned the next couple of dice to firing on the hospital with my transports to no great effect. Unsurprisingly the final SS squad assaulted onto the board against the flamethrower squad using the building to cover their approach from the T34. Too close for defensive fire again - but again this was still seven veterans with four SMGs. In another horrible combat for the Soviet Union the SS wiped out the defenders, taking heavy casualties in the process, leaving the attacking force with no infantry sections left in the fight. The T34 was still in ambush and unable to act. To add insult to all the genuine carnage the University Assault Battalion Section ran forward placing themselves closer to the Bren Carrier than any friendlies and it promptly surrendered. With that the turn came to an end with the balance firmly in favour of the Axis.

The PzIV enters play and manages to miss a building its is pretty much parked in.
With their heavy support failing to do the job the lead SS section storm the building taking heavy losses but leaving the section commander in possession of the room.
The Soviets launch a counter assault against the lone SS NCO…who promptly sends them packing.
The final SS section storms the Soviet right flank driving off another recce section.
Left isolated the Bren Carrier crew surrender to the approaching University Assault section.
Turn 4

Turn 4. Unsupported armour. So, no infantry left apart from my Pl Comd…about that though… With so many squads out the game initiative was now firmly with the axis who immediately launched an assault against my isolated officer. The plucky Soviet stood his ground and he and his runner managed to kill four of their attackers as they charged in, a remarkable achievement with their SMGs. Despite this, in close combat the lone German lunatic overwhelmed his opponents leaving me with no dismounts left. In a fit of unwise spite I activated the T34 next and used it to despatch the SS squad skulking in the Axis end zone. A point gained but it left my tank unable to react when the PzIV trundled round the corner and put a high velocity round straight through it. With little left the turn petered out as I withdrew my transports to huddle further away from the advancing Axis infantry. At 7-2 to the defenders my only chance to claw back points in turn four was going to be some very sneaky driving to cluster my remaining transports together and simultaneously rush them round to the other side of the board and into the end zone - long odds.
Despite excellent marksmanship the Soviet Pl Comd is beaten and flees from the SS.
The PzIV one-shots the T34.
Turn 5

Turn 5. Tidying up. This was never likely to be a long turn. I needed to get all the early order dice pulls to start fleeing rearwards to conduct my Hail Mary run down the western edge; however, with most of my order dice now out the game only one of my transport got underway before Axis drew and The Scot advanced the PzIV. The tank pulled around the buildings and put a round into a half track, the lightly armoured transport did rather better than the T34 only being immobilised though. In response this rather shell-shocked crew engaged the lone SS-man who had beaten up my Pl Comd and managed to despatch him. Before I had a chance to move my remaining car it was knocked out by a PzFaust from the remaining SS section advancing in the centre. That brought us to the end of the turn and, with no friendly troops closer than the advancing Axis, both remaining Soviet transports surrendered.
A wipe out - 10-3 to the Defenders.
The SS knock out the White Scout Car with a PzFst while the University Assault team advance to force the remaining Soviets transports to surrender.
Post-mortem. So that didn’t go entirely to plan… I think I got a bit too fixated on getting in early and digging in - I had not considered how this could expose me to close assault while removing my defensive fires. The awkward ignition of the building I wanted to hang my defence off wasn’t the end of the world; but, by moving the flamethrower squad to where it could be assaulted without firing again I offered up my best house clearing asset cheaply. I would, probably, have done better to hold back slightly allowing my transports’ HMGs and sections’ SMGs to hit the SS as they moved up. That said the close assaults went horribly - the ludicrously tough SS NCO who managed to see off a seven man veteran squad solo wasn’t something I could have planned for! This was a fun scenario and the end result of our game mirrored the historical outcome with outgunned recce troops making good initial progress but being closed down fast. The Budapest Defenders list is pretty flexible while the Forward Recce Detachment is fun but brittle - lack of infantry options is challenging and the cost of mandatory transports is steep (no cheap trucks). All in though, and despite the result, I think this is a pretty balanced scenario. The Soviets have the chance to make plan and build a position before the Axis can react and the mobility of the Soviet list allows them to rush in units to the scoring zone late in the game.
Another good scenario and a good scrap.


Comments
Post a Comment